Infrastructure as a Code is one of the many buzzwords that took the industry by storm upon the arrival of cloud computing. An extended part of the DevOps philosophy, IaC focuses on automating the creation, maintenance and destruction of infra, predominantly on cloud platform. Consider the scenario where the IT team of an organization receives a ticket in the morning to create a VM with specific configurations, and another ticket to delete or modify the machine by the end of the day. This simple sounding request can turn into a day long task if we inject scale into the scenario. The team receives hundreds of requests everyday from different development teams for creation, modification and update of various machines. Every request is serviced manually, and the team installs everything on the machine as per the request. With various requests coming in everyday, and with different versions of software being installed as and when they are available, very soon the deployments start to look like snowflakes. All of them unique with their own configuration setup.
This is a scenario which when imagined at scale, can become a huge problem for the company. With hundreds of configuration deployments without any standardization, it will be a mammoth task to maintain the infrastructure. Even a simple change request, like version upgrade, will have to be executed manually for all configurations. Infrastructure as Code can help in managing such situations by automating deployment and management of these configurations using code.
Infrastructure as Code (IaC) automates the provisioning of infrastructure, enabling your organization to develop, deploy, and scale cloud applications in a declarative manner with greater speed, less risk, and reduced cost.
The key here is the declarative way of implementation i.e. by using configuration files which can be reused to deploy infrastructure multiple times. Code is written in files to create and update infrastructure on cloud, and these files can be used to create identical infrastructure in multiple environments. This helps in maintaining idempotency across various dev, test and prod environments and hence reduces chances of errors due to configuration mismatch. Automating the process also helps the organization complete deployments at a much faster pace enabling the dev teams to test the applications whenever they want.
Since it is not an uncommon scenario for a large organization to maintain hundreds of deployments, IaC has been adopted in an industry wide manner, with various solutions being used by IT teams. Some of the popular IaC solutions available in the market are:
- Terraform by HashiCorp
- CloudFormation by AWS
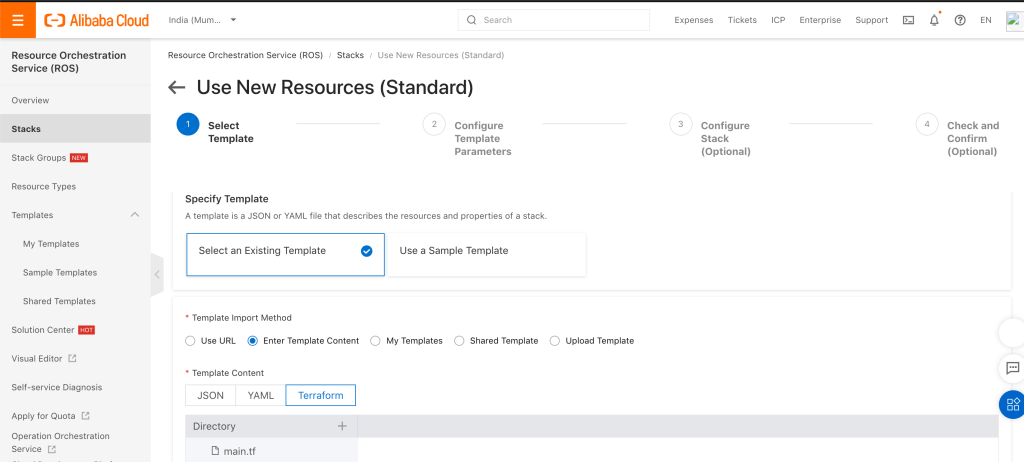
- Resource Orchestration Service by Alibaba Cloud
- Ansible
- Google Deployment Manager by GCP
- Azure Resource Manager
- Chef
- Puppet
- Salt Stack
- Vagrant
While solutions like ROS and Cloudformation are popular for cloud users, Terraform has emerged as an industry standard used by thousands of organizations across the world. Terraform is an open source solution, and given its popularity, is compatible with all cloud platforms in the market. This helps organizations use same terraform scripts (with minimal changes) in a hybrid cloud environment.
How Terraform works
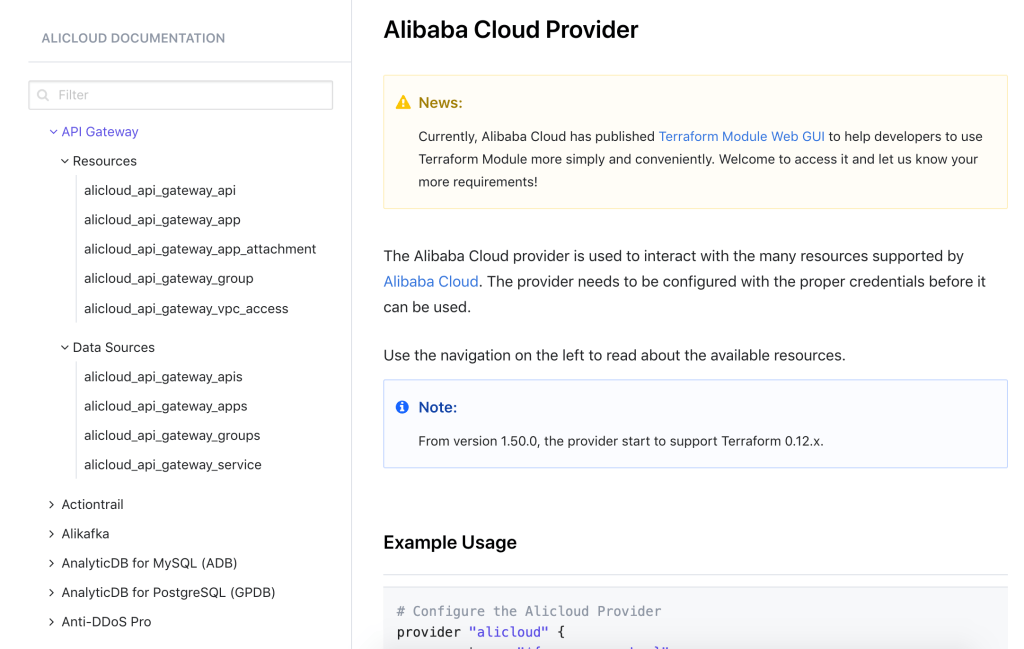
Terraform supports more than 900 providers (aka the platform). It integrates with the provider’s API to control the infrastructure deployment. Details of these providers can be seen on the Terraform website. Once you have selected your provider, you can use APIs for all the products integrated with Terraform. Terraform provides well laid out examples in their documentation that makes creation of terraform scripts very easy.
Terraform APIs can be divided into two parts:
Resources: Resources are APIs used to access the resources available on the provider platform and take actions around them. Eg: API to create ECS instance, attach EIP, create vSwitch etc.
Data Sources: These APIs can be used to fetch information from the provider about a component. Eg: Get the list of available zones in a region, get the list of all ecs instance types with spec 2vCPU and 4GB RAM, etc.
Using these APIs, the script needs to be written in the base file called main.tf. Main.tf is the source file for the terraform script and is executed when we run Terraform.
Installing Terraform
Terraform can be installed from the official website link. Terraform has CLI available for Windows, Linux and Mac. If you are using a Mac, then the most convenient way to install Terraform would be to use homebrew.
brew tap hashicorp/tap
brew install hashicorp/tap/terraform
Creating resources using Terraform scripts
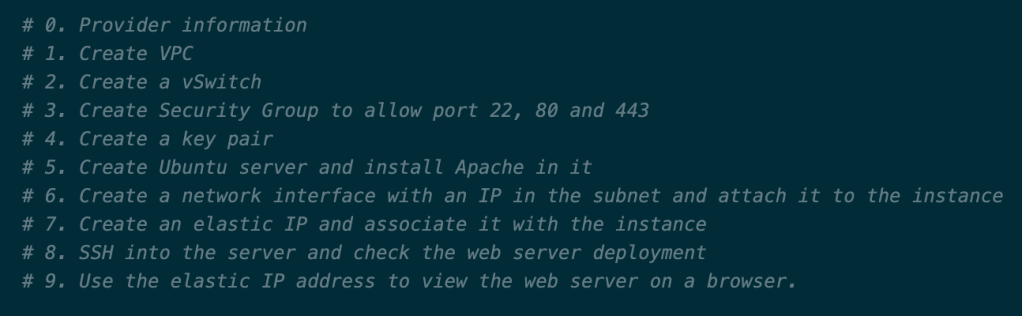
We will now try to create infrastructure on Alibaba Cloud platform using terraform scripts that we will write in a text editor. I have used Visual Studio Code in this case, but any text editor can be used to create the script. We will write the script to deploy a web server on Alibaba platform with Apache installed. The web server should have an elastic IP attached to it, and traffic on HTTP and HTTPs should be allowed along with ping and ssh login available. In order to complete this scenario, we will divide the script into following parts:
On the text editor, we will create a folder called Terraform, and in it, a file called main.tf where we will write the below code.
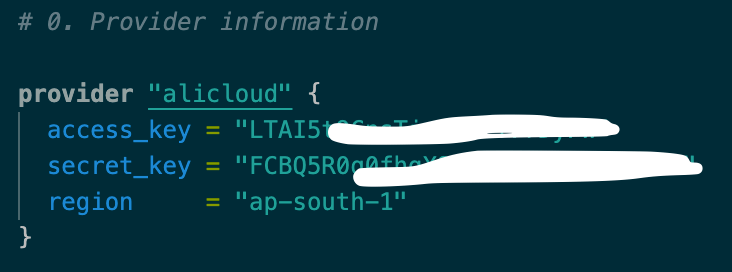
Provider Information: In order to write a script for Alibaba Cloud (or any other platform), we need to connect the script with the platform. We have mentioned Alicloud as the provider and provided access key and access secret of the account to connect to the alibaba cloud account. We have also mentioned the region that we want to create the web server in (in this case, ap-south-1 Mumbai region).
Once we have entered the provider information, we can open terraform CLI and ‘cd‘ to the folder where main.tf is stored (or open terminal window in Visual Studio Code), and run the command “terraform init“. This will ask terraform to download all the APIs and packages relevant to the provider ‘alicloud‘. Once initialized, you can then use intellisense and code-completion feature of the editor making the rest of the process a little easier.
Create a VPC: We can refer to the terraform documentation to understand the syntax and parameters for each resource that we want to create. For Alicloud provider, all the resources have been mentioned in the documentation and the APIs for the resources show code examples which are very handy for writing the script.
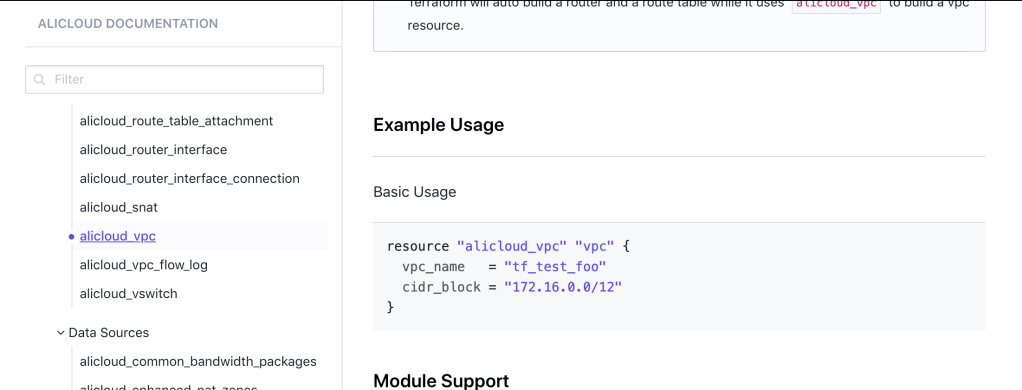
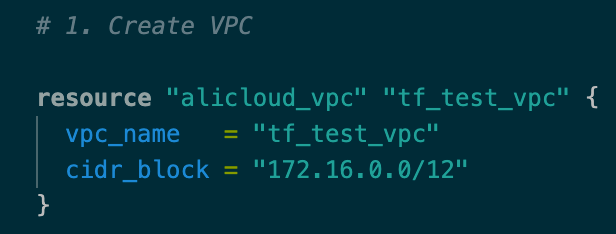
In order to create a VPC, we mention the API name as resource followed by our chosen name for the resource (vpc). The parameters available for a particular resource are listed in the documentation. For VPC, we have added vpc_name and mandatory parameter of cidr_block as given in the example on documentation page.
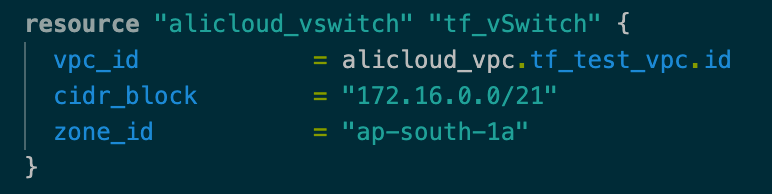
Create a vSwitch: Once we have created a VPC, we need to create a vSwitch or a Subnet. Using the sample code in documentation, we have written code for vSwitch resource with parameters like vpc_id, cidr_block and zone_id. Here, for vpc_id we refer to the id of the vpc created in above step. This can be done by calling the resource type of vpc (alicloud_vpc) followed by name chosen for the resource (vpc) followed by ID. Such referencing is heavily used on TF scripts and will be handy in this setup as well. We also mention the zone id for availability zone of the chosen region where we want to create the subnet. We have chosen the Zone A in Mumbai.
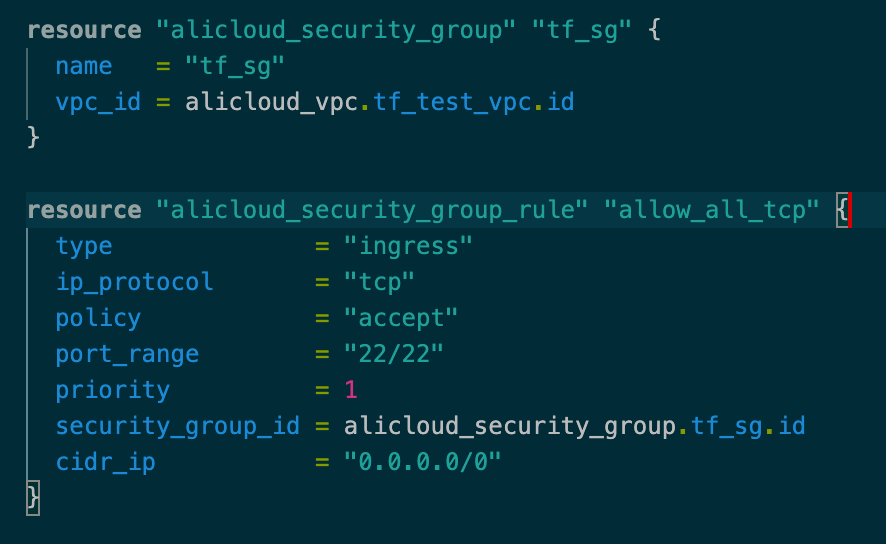
Create Security Group to allow port 22, 80 and 443: Now we create the security group which would contain network rules for ports and protocols that need to be opened. We need to allow HTTP and HTTPs web traffic from all sources. We also need to allow pings, and ability to login to the instance through SSH. Here, we create the security group and then add different rules in it.
Create a key pair: We will now create a key pair which will be attached to the instance and will be used for logging into the system using SSH. We add the key file name parameter here which will be referred later on when we create the instance. Once the key pair is created, the key file will be stored in the folder where main.tf is present.

Create web server and install Apache: Now we have all the necessary components in place to create an instance. For creating an instance, we would need to input the instance type, image ID and through referencing, mention the security group, vSwitch and key pair that needs to be associated with the instance. There are many more parameters that can be used here, we have limited ourselves to the mandatory ones.
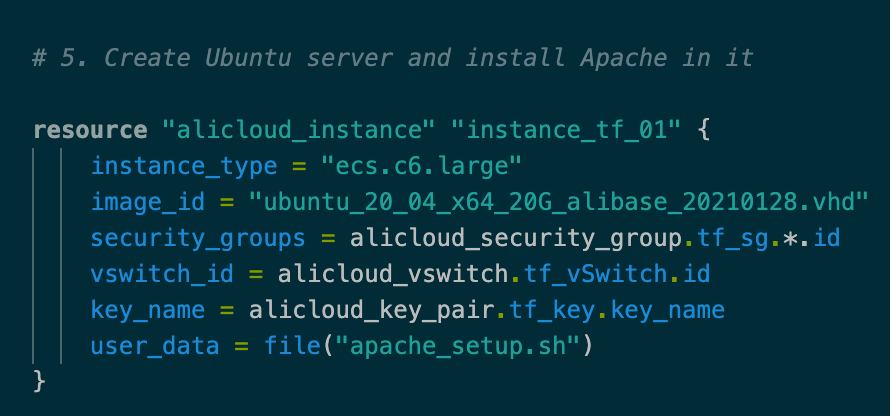
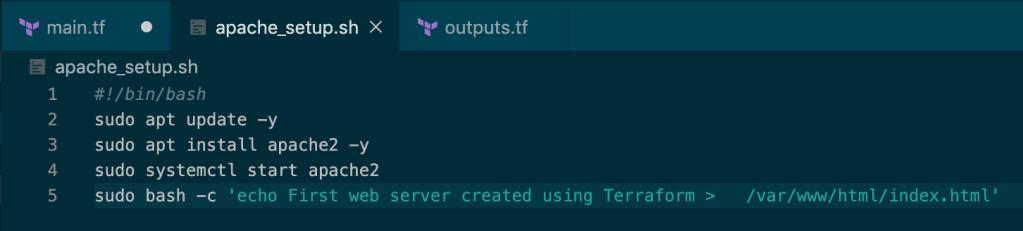
Along with creation of the instance, we also want to install Apache in it. Therefore, we use the user_data parameter which will be run when the instance is created. We input the file apache_setup.sh into user data, and add apache installation script in this file and store it in the same folder where main.tf is stored. Post installing Apache, we have also added a welcome message on index.html file.
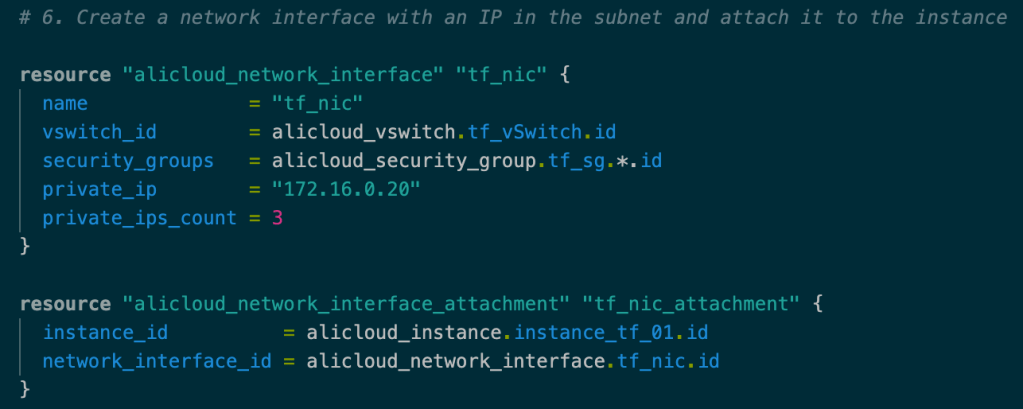
Create an NIC and attach it to the instance: Once the instance is created, an NIC needs to be created in order to attach the instance to the network and generate a private IP for the instance. We can mention the private IP in the vSwitch CIDR range, and if it is not a reserved IP, it will be assigned to the instance. We also attach the NIC to the instance by referring to the instance_id of the instance just created.
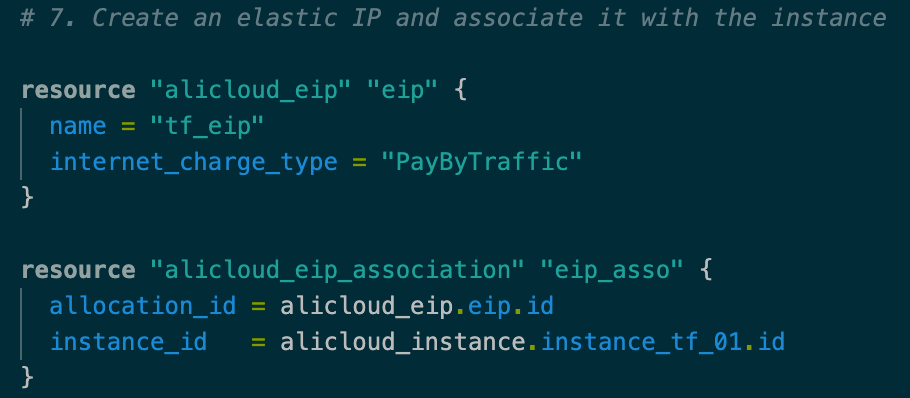
Create an elastic IP and associate it with the instance: In order to expose the web server to internet, we need to create an elastic IP address and attach it to the instance. While creating the EIP, we can also mention the billing method that we want to choose for the EIP (PaybyBandwidth or PaybyTraffic). If not mentioned, PaybyBandwidth will be selected by default. Once again, we attach the EIP to the instance by referring to the instance_id.
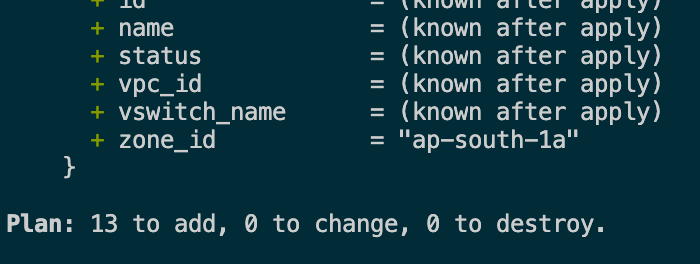
Now our script is complete and is ready for execution. In order to run the script in terraform, we need to run the command “terraform apply“. This will apply all the changes into the provider portal. But before we do that, in big production environments, its always better to check whether the script is in order or not before it is executed. To do this, we run the command “terraform plan“. This command checks the entire script for possible issues and if not found, tells us which resources will be created/ deleted/ modified once the script is run. This gives us a clear picture of the anticipated changes in the configuration.

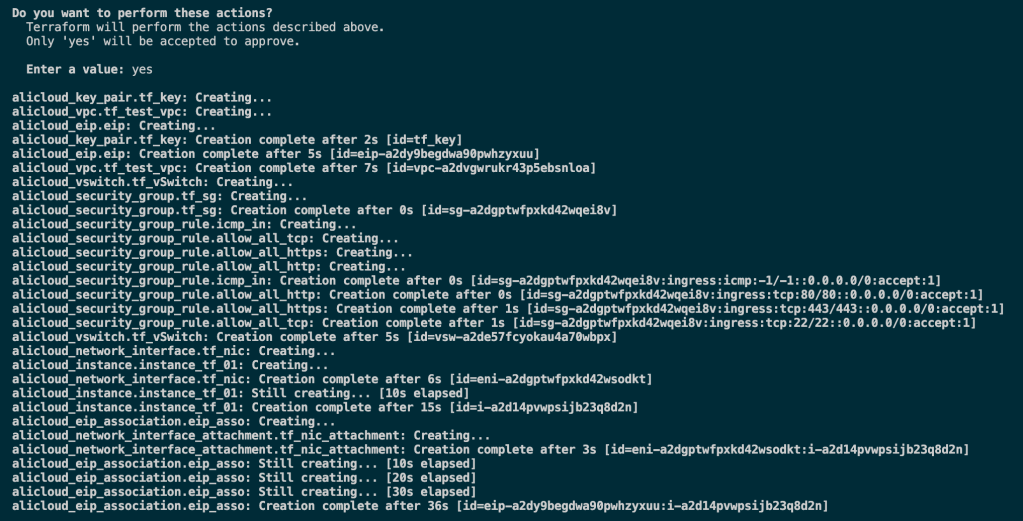
Once you are satisfied with the information provided by ‘terraform plan’, you can run the script using ‘terraform apply’. The script will then run on the provider platform, and given there are no errors in the script, should finally create a web server with apache installed inside it.
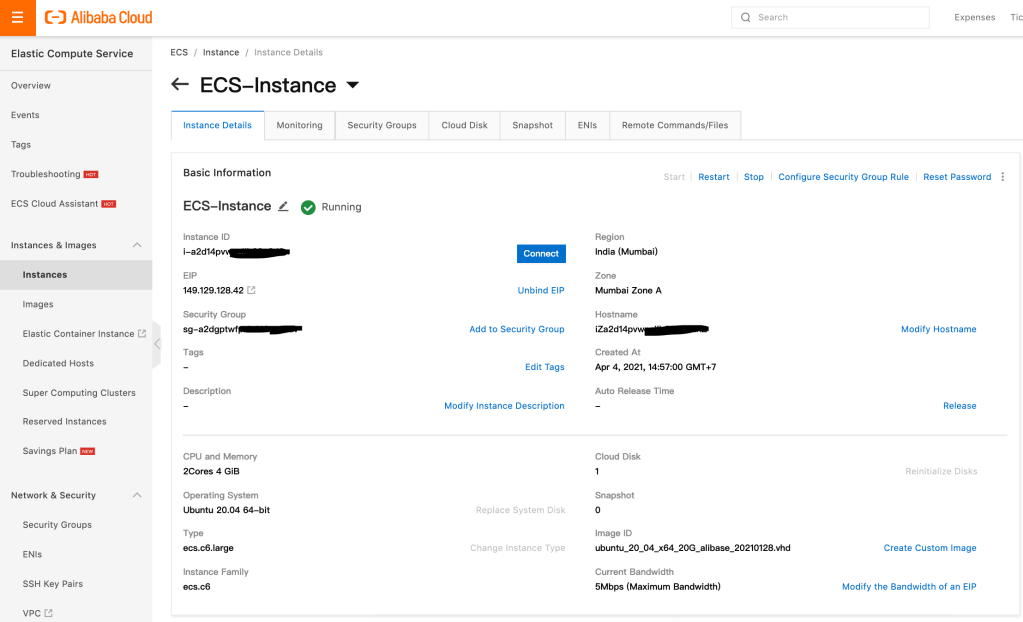
We can verify the script result by checking for the instance on our Alibaba Cloud ECS console. We see that the instance has been created successfully on the console. We also check the details of the instance like vpc, vswitch, security group, and note the elastic IP address that is attached to the instance.
SSH into the instance and check for web server deployment: With elastic IP noted, and port 22 enabled, we will now SSH into the instance using the key pair file which is present in the same folder as main.tf file. The host name for the instance is ‘root‘ by default. Once logged into the instance, we would go to /var/www/html and list the files to see index.html file present there. If the file is present in the location, this would signify that installation of apache server has been successful.

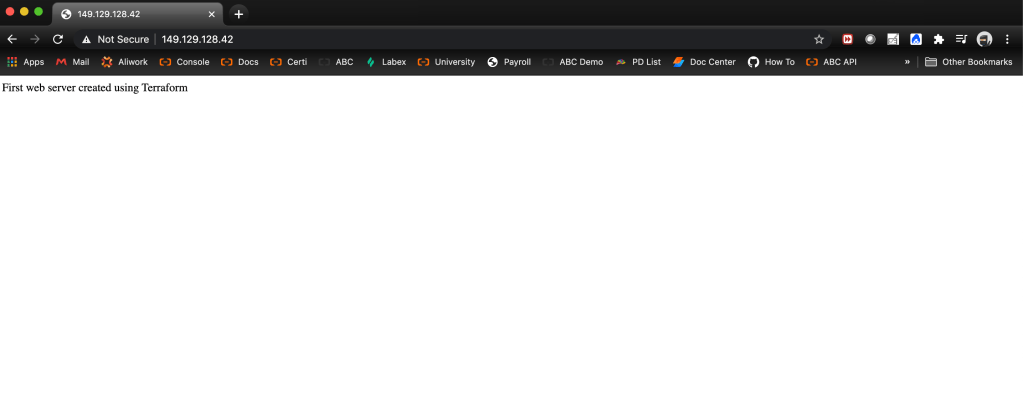
Use the Elastic IP to view the web server index page on a browser: Finally, having confirmed the installation of apache web server, we use the elastic IP of the instance and enter it in a web browser to see the custom welcome message that we had entered in the apache_setup.sh file earlier.
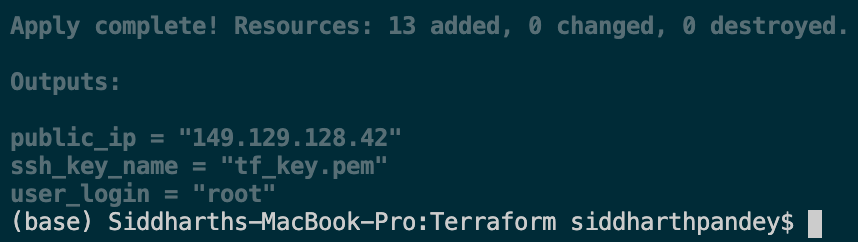
In the above script, we extracted the elastic IP from Alibaba Cloud console post running the script. In some scenarios, it would be desirable to get some output from the script itself post it creates the infrastructure. We could get the elastic ip address as an output which then can be used to verify installation, on the browser. In order to get such output parameters from the script, we need to create another file called outputs.tf in the same folder as main.tf file. In the output file, we define the which parameters we need as an output and refer to the parameter under its value.

In above output file, we passed three output variables: ssh key pair file name, login username and elastic IP address. With this simple syntax, we can get these values on the terminal itself once the script has run successfully.
There can be various complex scenarios that can be configured using terraform scripts. Once the script is ready, it can be reused as and when required and infra can be configured in a matter of seconds. Once we take this implementation into production, we also look at other useful points like that of masking the provider login details which contains access key and secret. We can combine these and other important and common parameters and put them into a separate file called .tfvars file. This makes the overall deployment safer and more controllable. We should aim to cover variables file and other advanced concepts in terraform in the next blog on this topic.
The above used terraform main and output script can found on github here: https://github.com/Pandeysiddharth/terraformscript01
